
Attic Insulation & Air Sealing: Home Maintenance Services NY Homeowners Need Now
High energy bills in Albany often start in the attic. Heat rises, then escapes through gaps and under-insulated areas. Cold air leaks in during winter. Moist, hot air lingers in summer. Attic insulation top-offs and whole-house air sealing fix these problems fast. You get lower bills, steadier room temperatures, and a healthier home. If you want a trusted local team to assess and complete the work, A&S Home Services can help.
For homeowners looking to go a step further, this guide on home efficiency upgrades Latham NY explains how professional insulation, air sealing, and targeted repairs can significantly reduce utility costs, improve comfort, and boost overall energy performance year-round.
What is an attic insulation top-off, and how is it different from a full replacement?
Q: What does “top-off” mean?
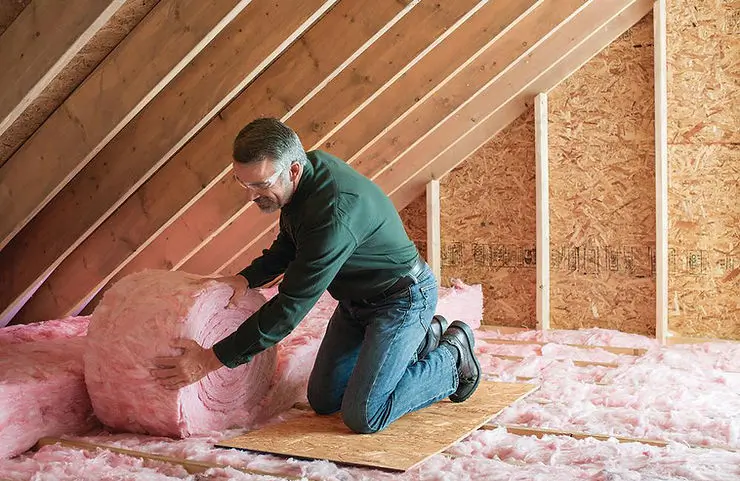
A top-off adds new insulation over existing material to reach the recommended R-value. You keep what still works. You raise performance quickly and cost effectively.
Q: When is a top-off enough?
- Your current insulation is dry, clean, and evenly distributed.
- You measure less than R-49 in the attic for Albany homes in climate zones 5 and 6.
- You see no major air leaks or you seal them first.
Q: When do you need a full replacement?
- Insulation is wet, moldy, or rodent damaged.
- You have knob-and-tube wiring that requires special handling.
- You need to remove old vapor barriers or contaminated materials.
How does air sealing work, and why combine it with insulation?

Q: What is air sealing?
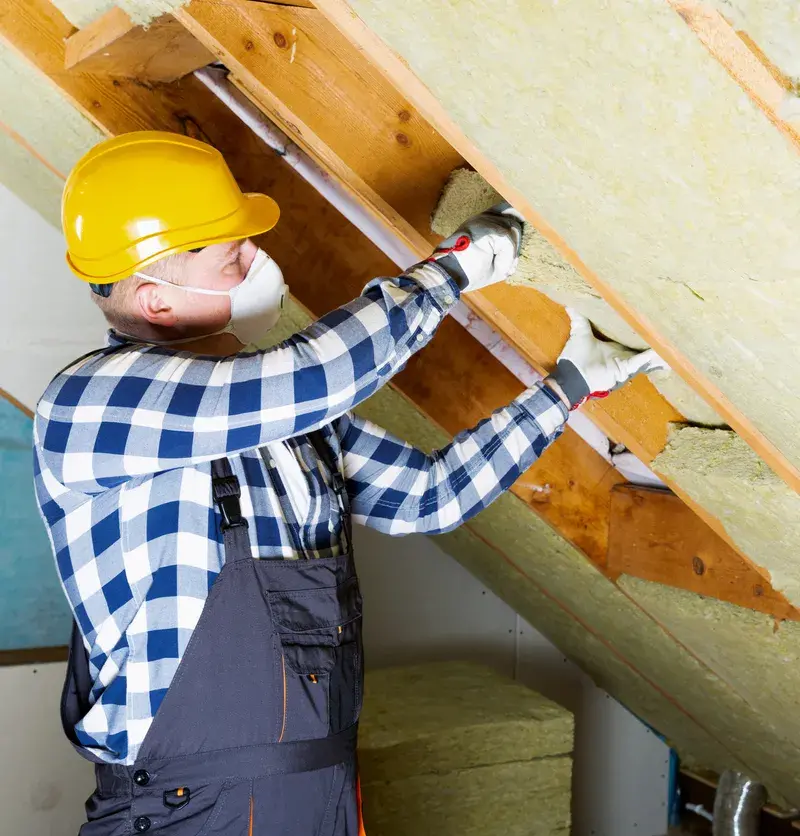
Air sealing closes gaps, cracks, and penetrations that let air move between the attic and the living space. Teams use foam, caulk, gaskets, and weatherstripping. They focus on top plates, can lights, wire and pipe penetrations, attic hatches, chimneys with proper clearances, and bath fan housings.
Q: Why do air sealing first?
Insulation slows heat transfer. It does not stop moving air. Unsealed leaks move conditioned air out and bring unconditioned air in. Air sealing first prevents that loss. Then the insulation top-off keeps heat in during winter and heat out during summer.
Q: What results should you expect?
- Lower heating and cooling run time.
- Fewer drafts and room-to-room temperature swings.
- Less ice dam risk because warm air no longer heats the roof deck from below.
How much energy can NY homeowners save with air sealing and a top-off?
Q: What savings are typical for Albany?
Homes in Albany often have 3 to 8 inches of loose-fill insulation. That is roughly R-9 to R-26. The Department of Energy recommends R-49 to R-60 for attics in climate zones 5 and 6. Air sealing plus an attic top-off commonly saves 10 to 20 percent on heating and cooling. Older homes often save at the high end.
| Existing Attic Condition | Target R-Value | Estimated HVAC Savings | Comfort Impact |
|---|---|---|---|
| R-9 to R-13, minimal air sealing | R-49 to R-60 | 15% to 20% | Large |
| R-19 to R-26, some leaks | R-49 to R-60 | 12% to 18% | Moderate to large |
| R-30 to R-38, many can lights and gaps | R-49 to R-60 | 10% to 15% | Moderate |
These ranges reflect typical NY climates, fuel prices, and common leakage points. Actual savings vary by house size, equipment, and occupant behavior.
How do you know if your attic needs more insulation or better sealing?
Q: What are the warning signs?
- Rooms feel hot upstairs in summer and cold in winter.
- Snow melts fast on roof areas above the attic, then forms ice dams at the gutters.
- High energy bills compared to neighbors with similar homes.
- Dusty drafts around light fixtures or attic hatches.
- Visible gaps at top plates, electrical penetrations, or bath fan housings.
Q: Step-by-step evaluation checklist you can do today
- Measure current insulation depth. Use a ruler or marked stick. Loose-fill cellulose is about R-3.2 per inch. Fiberglass loose-fill is roughly R-2.5 per inch. Batt fiberglass is about R-3 per inch.
- Estimate current R-value. Multiply depth by the R per inch for your material.
- Check the target. Aim for R-49 to R-60 for Albany.
- Inspect for moisture. Look for dark stains, clumping, or a musty smell. Wet material needs remediation.
- Find the big leaks. Look for light shining up from the living space, visible gaps at top plates, and unsealed can lights.
- Check the attic hatch. If it lacks weatherstripping and insulation, add both.
- Confirm ventilation. Verify clear soffit vents and a clear baffle path to the ridge or gable vents. Do not block airflow with insulation.
- Note safety items. Identify knob-and-tube wiring, recessed lights that need covers, and chimney clearances. Mark these before any work.
Q: What should you do after the check?
- If R-value is below R-49 and the material is dry, plan a top-off to reach R-49 to R-60.
- Seal the attic plane first. Use foam, caulk, and gaskets at gaps and penetrations.
- Install baffles at soffits before adding insulation to maintain airflow.
- Insulate and seal the attic hatch.
What insulation materials work best in Albany’s climate?
Q: What are the common options?
| Material | R per Inch | Best Use | Pros | Considerations |
|---|---|---|---|---|
| Cellulose loose-fill | ~3.2 to 3.7 | Top-offs over existing insulation | Good coverage, sound dampening, recycled content | Heavier than fiberglass, needs correct density |
| Fiberglass loose-fill | ~2.5 to 2.8 | Top-offs, fast install | Lightweight, does not settle much | Lower R per inch, control air movement with sealing |
| Fiberglass batts | ~3.0 to 3.2 | Simple joist bays | DIY friendly | Gaps reduce performance, cover carefully |
| Closed-cell spray foam | ~6.0 to 7.0 | Targeted areas, rim joists | High R per inch, air barrier | Higher cost, needs pro install, curing conditions matter |
Q: Which should you choose?
- For most top-offs, cellulose or fiberglass loose-fill over sealed air leaks works well.
- Use spray foam for small sections that need an air and vapor barrier, like rim joists or tricky penetrations.
- Use batts only when cavities are uniform and accessible, and when you can install without gaps.
What does a professional attic top-off and air sealing visit include?
Q: What steps should you expect?
- Assessment and testing. The team inspects the attic, measures insulation depth, and may run a blower door test to quantify leakage.
- Safety prep. They protect work areas, isolate the attic hatch, check electrical conditions, and set up lighting and boards.
- Air sealing first. They seal top plates, can lights, wire and pipe penetrations, bath fans, and the attic hatch. They install fire-safe covers and maintain clearances at chimneys.
- Ventilation check. They install baffles at soffits and clear existing vents so airflow remains correct after the top-off.
- Insulation top-off. They add loose-fill insulation to the target depth for R-49 to R-60. They mark rulers to verify depth across the space.
- Final quality check. They verify hatch sealing, depth consistency, and clean up the work area.
When should you hire home maintenance services ny?
Q: Which signs point to a pro?
- Insulation is wet, moldy, or contaminated.
- You see complex wiring, old recessed lights, or chimney penetrations.
- You suspect major air leaks or need blower door testing.
- You want guaranteed R-values and documented results.
- You need fast, clean work with proper safety protocols.
Q: Can you DIY some tasks?
You can seal minor gaps with caulk and foam. You can install weatherstripping on the attic hatch. You can add baffles and measure depth. Many homeowners still hire a pro to ensure coverage, depth, and safe handling around electrical and combustion areas.
How much does it cost in New York, and what is the payback?
Q: What are typical price ranges?
Costs vary by attic size, access, and air sealing needs. The ranges below reflect many Albany projects.
| Scope | Typical Cost | Annual Energy Savings | Simple Payback |
|---|---|---|---|
| Air sealing only | $600 to $1,500 | $120 to $250 | 3 to 8 years |
| Insulation top-off only | $1,200 to $2,500 | $150 to $300 | 4 to 9 years |
| Air sealing + top-off | $1,800 to $4,500 | $250 to $500 | 3 to 7 years |
Fuel prices change payback. Many Albany homes heat with natural gas, oil, or heat pumps. Savings grow when you improve both sealing and R-value together.
Get two or three quotes from home maintenance services ny to confirm pricing for your attic size and condition.
Is DIY worth it, or should you call a pro?
Q: What risks come with DIY?
- Coverage gaps that reduce R-value performance.
- Missed air leaks, which shrink savings.
- Blocked soffit vents that trigger moisture or ice dams.
- Improper clearances around heat sources and chimneys.
- Exposure to dust and insulation fibers without proper PPE.
Q: What can you safely DIY?
- Install weatherstripping on the attic hatch.
- Seal small gaps with caulk and low-expansion foam.
- Install baffles at eaves before adding insulation.
- Measure and mark depth rulers for even coverage.
Q: When safety or time matters
If you run into unsafe wiring, active leaks, or structural issues, pause work and call a pro. For sudden issues like roof leaks or storm damage, review this guide to plan next steps: Emergency Handyman Repair.
Which rebates and incentives can lower your cost in NY?
Q: What programs are common?
- State energy programs that offer incentives for air sealing and insulation when installed together.
- Utility rebates for insulation, air sealing, and smart thermostats.
- Income-qualified programs that increase incentives for eligible households.
- Federal tax credits for qualified insulation materials and air sealing products.
Q: How to maximize incentives
- Complete a home energy assessment first. Many programs require it.
- Bundle air sealing with the top-off to unlock higher rebates.
- Save invoices and product data sheets for claim forms.
- Ask your contractor to provide before and after photos and R-value documentation.
How should you prepare your attic before work?
Q: What prep steps help the project go faster?
- Clear the attic floor of stored items. Label what stays.
- Identify any known roof leaks or past moisture issues.
- Confirm the location of bath fans, wires, and plumbing penetrations.
- Plan for pet care during noisy work hours.
- Provide a clear path to the attic hatch.
Q: What safety steps matter?
- Wear goggles, gloves, and an N95 or P100 mask if you enter the attic.
- Use boards to walk across joists. Do not step on drywall ceiling panels.
- Turn off power to circuits if you work near wiring.
- Keep foam and sealants away from heat sources.
How do you keep your attic efficient after the upgrade?
Q: Simple maintenance routine
- Check the attic after the first heavy snow. Look for even snow cover on the roof and no ice dams.
- Inspect the attic each spring and fall. Verify insulation depth has not shifted.
- Keep soffit vents clear of debris and nests.
- Seal new penetrations any time you add lighting or run cables.
Q: Plan seasonal improvements
Once the attic is efficient, focus on outdoor upkeep and weather-ready upgrades to support the envelope. For ideas, see 8 Smart Ways to Upgrade Your Outdoor Space.
What are real-world examples for Albany homes?
Q: Example 1, 1950s Cape, 1,400 sq ft
- Before: R-13 loose-fill, many can lights, leaky attic hatch.
- Work: Air sealing of top plates and fixtures, hatch insulation, cellulose top-off to R-60.
- Result: 18 percent lower heating use, upstairs bedrooms hold temperature overnight, fewer drafts.
Q: Example 2, 1990s Colonial, 2,200 sq ft
- Before: R-30 fiberglass, bath fan duct leaked air in winter, soffit vents blocked.
- Work: New bath fan ducting to exterior, baffles, air sealing, fiberglass top-off to R-49.
- Result: 12 percent HVAC energy savings, no more condensation on windows, longer furnace off cycles.
Q: Example 3, 1900s two-story, 1,800 sq ft
- Before: Mixed insulation, visible gaps, rim joist air leaks.
- Work: Targeted closed-cell foam at rim joists, air sealing of penetrations, cellulose top-off to R-55.
- Result: 16 percent energy reduction, quieter rooms, warmer floors.
What are the most common attic air leaks you can seal today?
Q: High-impact leak sources
- Top plates where drywall meets framing.
- Recessed light housings and trim rings.
- Wiring and plumbing penetrations.
- Open chases for ducts or pipes.
- Attic hatch perimeters.
Q: How to seal them
- Use acrylic or silicone caulk for small gaps.
- Use low-expansion spray foam for larger gaps.
- Install fire-rated covers over recessed lights that are not IC-rated, then air seal around them.
- Add an insulated, gasketed attic hatch cover.
What simple tools and materials do you need?
Q: Basic DIY kit
- Caulk gun and quality caulk, interior and exterior rated.
- Low-expansion spray foam cans and applicator.
- Utility knife, shears, and a straightedge.
- Rulers for depth marking.
- Staple gun and baffles for soffits.
- PPE, gloves, goggles, N95 or P100 mask, coveralls.
Q: When to call a pro for tools
- Blower door testing to measure leakage.
- Insulation blowers for large top-offs.
- Thermal imaging to find hidden leaks.
Can you combine attic work with other upgrades?
Q: High-value bundles
- Air sealing plus attic top-off. This delivers the biggest combined savings.
- Smart thermostat with sealing and insulation. You improve control and reduce runtime.
- Bath fan ducting to exterior, then air seal and insulate. You reduce moisture risk.
What does a good project timeline look like?
Q: Typical schedule
- Day 1, assessment and testing. 1 to 2 hours.
- Day 2, air sealing and prep. 3 to 6 hours.
- Day 2 or 3, insulation top-off. 2 to 4 hours depending on attic size.
- Final check and cleanup. 1 hour.
How can you verify results?
Q: Proof you should request
- Before and after photos of air sealing and insulation depth markers.
- Written R-value and depth confirmation across multiple attic points.
- Blower door results if tested before and after.
- Combustion safety checks where applicable.
What about indoor air quality and moisture?
Q: Do sealing and insulation affect IAQ?
Yes. Air sealing reduces dust and outdoor pollutant infiltration. Proper bath fan venting and attic ventilation maintain moisture control. Use balanced airflow and do not block soffit vents. If you add very tight air sealing across the whole home, consider checking ventilation rates to meet standards.
What visual guide can help you plan the project?
Q: Infographic concept you can use
- Panel 1, Attic Heat Map. Show red zones at can lights, top plates, and hatches before sealing. Show cooler colors after.
- Panel 2, R-Value Ruler. Diagram inches of cellulose or fiberglass to reach R-49 and R-60.
- Panel 3, Savings Stack. Bars for sealing, insulation, and combined savings.
- Panel 4, Ventilation Flow. Arrows from soffits to ridge, with baffles keeping the channel open.
What mistakes should you avoid?
Q: Common pitfalls
- Adding insulation without sealing leaks first.
- Blocking soffit vents with loose-fill or batts.
- Ignoring the attic hatch, which can act as a large leak.
- Covering non-IC rated recessed lights without proper protective covers.
- Leaving bath fans vented into the attic instead of outside.
How do costs compare for DIY vs pro work?
| Task | DIY Cost Range | Pro Cost Range | Key Risks if DIY | Typical Outcome |
|---|---|---|---|---|
| Seal small gaps | $30 to $120 for caulk and foam | $150 to $400 | Missed leaks reduce impact | Good if thorough |
| Install baffles | $50 to $150 | $150 to $350 | Improper spacing can block airflow | Good with careful layout |
| Blow in loose-fill | $300 to $900 with rental | $800 to $2,000 | Uneven depth, dust exposure, wiring hazards | Pro gives consistent coverage |
| Whole-house air sealing and top-off | $500 to $1,600 materials | $1,800 to $4,500 | Lower savings if gaps remain, safety issues | Pro delivers tested results |
How can you plan the project budget and compare bids?
Q: Checklist for comparing proposals
- Scope includes air sealing before insulation.
- Target R-value is R-49 to R-60 and stated in writing.
- Depth markers at multiple locations included.
- Vent baffles and hatch insulation included.
- Combustion and electrical safety addressed.
- Photos before and after provided.
- Rebate paperwork support included.
FAQ: Attic Insulation Top-Off and Air Sealing
Q: Do I need to remove old insulation before a top-off?
No, if it is dry, clean, and not contaminated. If it is wet or moldy, remove and remediate first.
Q: How much insulation depth do I need for R-49 to R-60?
Cellulose needs about 14 to 19 inches. Fiberglass loose-fill needs about 17 to 23 inches. Follow manufacturer charts.
Q: Will air sealing make my house too tight?
Not likely from attic work alone. If you complete whole-house sealing, verify ventilation rates and use balanced ventilation if needed.
Q: How long does a typical job take?
One day for most attics. Large or complex attics may take two days.
Q: Will I see results right away?
Yes. Comfort changes show up in days. Energy savings show up on your next utility bills.
Q: Can I finance the project?
Some contractors and programs offer financing. Ask about monthly payment options that fit the energy savings.
How do you decide the best time of year to schedule the work?
Q: When is ideal?
- Spring and fall offer mild temperatures for attic work.
- Late summer works with proper ventilation and safety.
- Winter is possible but colder. Prep your hatch area and plan for quick attic access to hold in heat.
What documentation should you keep after completion?
Q: Essentials for your records
- Contract and scope of work.
- Photos and depth markers.
- Material data sheets and warranties.
- Rebate forms and proof of payment.
- Any blower door test results.
Ready to act on savings and comfort?
Q: What is your next step?
- Run the attic evaluation checklist.
- Document insulation depth and leak locations.
- Request two or three quotes that include air sealing plus a top-off.
- Confirm target R-49 to R-60 and ventilation details in writing.
Schedule an energy checkup with home maintenance services ny. Ask for a clear scope, photos, and rebate support.
Conclusion: What should Albany homeowners do now?
Air sealing and an attic insulation top-off cut energy waste in Albany homes. You get fewer drafts, steadier temperatures, and lower bills. Start with a quick attic check, then seal leaks and top off to R-49 to R-60. For a professional assessment and a clean, documented install, contact A&S Home Services today.