
Driveway Crack Sealing Basics for Upstate NY
Driveway cracks grow fast in Upstate NY. Winter cold, spring thaw, and summer sun stress asphalt and concrete. Water gets in. It freezes. It expands. Small cracks turn into wide gaps and potholes. You can slow that damage with proper crack sealing.
This guide shows you how. You will learn when to seal, what to buy, and how to do it step by step. You will also see what jobs to leave for a pro, how much it costs, and how timing fits our local weather. If you want help, A&S Home Services serves homeowners across the Capital Region and beyond.
Why Sealing Driveway Cracks Matters in Upstate NY
- Freeze-thaw protection. Water inside a crack freezes many days each winter here. Ice expands. The crack widens and deepens. Sealing blocks that cycle.
- Stops base erosion. Open cracks let water wash out the base under your driveway. This creates sink spots and potholes.
- Improves safety. Cracks and edges create trip hazards. Sealing and smoothing reduce risk.
- Preserves property value. A clean, tight surface looks maintained. Buyers see less future cost. Appraisers note condition.
- Reduces weed and ant problems. Sealed cracks deny space for growth and nests.
- Helps winter cleanup. A smooth surface is easier on snow shovels and plows. You push snow, not catch edges.
Common Driveway Crack Types You Will See
Identify the crack first. The fix depends on the cause.
| Crack Type | How It Looks | Likely Causes | Typical Fix |
|---|---|---|---|
| Hairline cracks | Very thin, random lines | Surface aging, UV, minor shrinkage | Clean, fill with pourable crack filler, sealcoat optional |
| Linear or longitudinal cracks | Single long cracks, often down the center | Thermal movement, minor base movement | Route if needed, backer rod for depth, hot or cold-pour filler |
| Transverse cracks | Cracks running across the driveway | Temperature swings, slab movement | Clean, fill, consider hot-pour for flexibility |
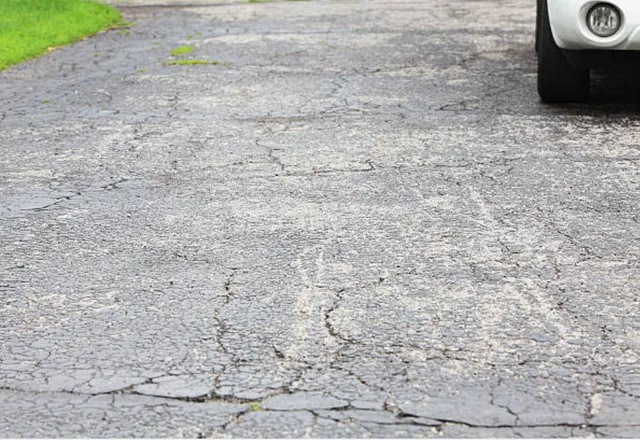
| Alligator or fatigue cracking | Dense network of small cracks like scales | Base failure, heavy loads, poor drainage | Cut out and patch the area, then seal edges. Do not just fill lines. |
| Edge cracks | Cracks along the sides | Poor support at edges, erosion, traffic near edges | Rebuild edge support, add soil and compaction, fill cracks |
| Block cracking | Grid pattern with large rectangles | Aging asphalt binder, low flexibility | Seal cracks, consider sealcoat. Plan for resurfacing later. |
| Settlement cracks | Crack near a low spot or trench line | Base settlement, poor compaction | Lift and patch area, correct drainage, then seal |
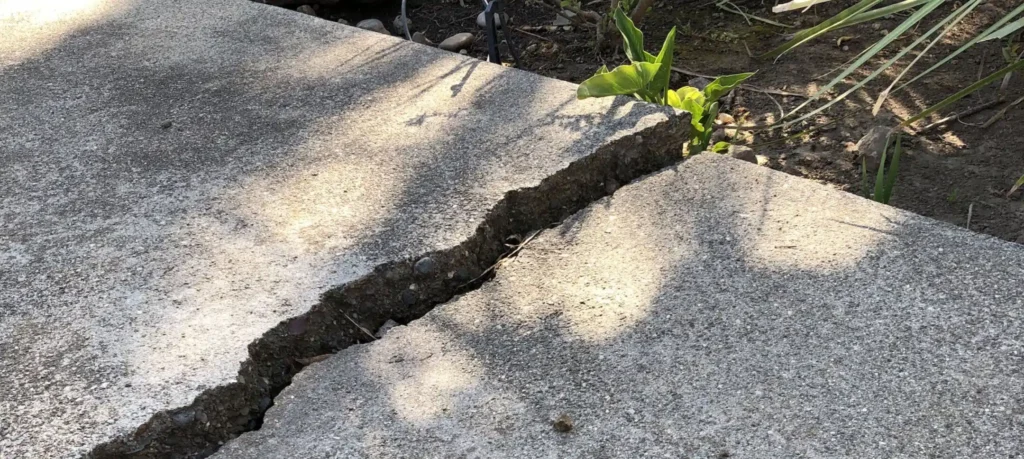
| Concrete control joint cracks | Along planned joints in concrete | Normal movement at joints | Clean and seal with self-leveling concrete joint sealant |
DIY or Hire a Pro? How to Decide
Use this checklist. If you answer yes to several pro items, bring in help.
DIY is a good fit when
- Cracks are under 1/2 inch wide and under 1 inch deep.
- The surface is stable, with no pumping or flex under foot.
- You can pick a dry, mild day with temps between 50 and 85 F.
- You have basic tools and an hour or two to work in sections.
Hire a pro when
- Cracks are wider than 1/2 inch or deeper than 1 inch.
- You see alligator cracking, potholes, or base failure.
- Water pools on the driveway or runs into cracks from poor drainage.
- You need hot-pour rubberized sealant and a melter kettle.
- You want warranty support and fast production on large jobs.
Get quotes from several local companies. Start by searching crack filling near me. Ask about product type, prep steps, and cure time. Request photos of recent work in your town.
Tools and Materials: What You Need
Match the product to the crack size and the season. The table below compares common options.
| Item | Best For | Pros | Cons | Est. Cost |
|---|---|---|---|---|
| Cold-pour asphalt crack filler (latex or acrylic) | Hairline to 1/2 inch asphalt cracks | Easy to use, no heat, local stores carry it | Less flexible than hot-pour, shorter life | $8–$15 per quart or bottle |
| Hot-pour rubberized crack sealant | 1/8 to 3/4 inch asphalt cracks | Flexible, long-lasting in freeze-thaw | Needs melter kettle and pour pot, higher skill | $40–$70 per 30 lb block, plus rental |
| Self-leveling polyurethane or silicone joint sealant | Concrete joints and control cracks | Stays flexible, self-levels | Needs clean, dry joints, can be pricier | $10–$20 per tube |
| Backer rod (foam) | Deep cracks over 1/2 inch deep | Controls sealant depth, saves material | Must size correctly | $5–$10 per 20 ft |
| Crack chaser or diamond blade | Routing and cleaning crack edges | Creates a clean reservoir for sealant | Dusty, noisy, requires saw grinder | $15–$50 per blade |
| Wire brush, stiff broom, or leaf blower | Cleaning out debris | Fast, low cost | May need vacuum for fine dust | $10–$30 |
| Propane torch or heat gun | Drying damp cracks and warming material | Improves bond and flow | Fire risk, use carefully | $30–$60 |
| Sand or fines | Dusting over fresh filler | Prevents tracking, improves appearance | Needs cleanup | $5–$10 per bag |
| Asphalt cold patch | Potholes or gaps over 1 inch wide | Fills volume, simple tools | Needs compaction, not for thin cracks | $12–$20 per bag |
Step-by-Step: How to Seal Driveway Cracks
Set aside time when the surface is dry and the temperature is between 50 and 85 F. Avoid rain for at least 24 hours after application.
Safety first
- Wear eye protection, gloves, and a dust mask when routing or brushing.
- Keep children and pets away until the area cures.
- If heating sealant, keep a fire extinguisher nearby.
1) Inspect and plan
- Walk the driveway. Measure crack widths and note any soft or pumping spots.
- Mark areas with alligator cracking for patch work, not simple sealing.
- List the materials you need using the table above.
2) Clean the cracks
- Use a wire brush or a crack chaser blade to remove loose material.
- Blow out dust with a leaf blower or shop vacuum.
- If damp, dry with a heat gun or wait for a sunny, breezy day.
3) Prepare deep or wide cracks
- For cracks deeper than 1/2 inch, press in backer rod. Leave room for sealant equal to the crack width.
- For very wide gaps, use asphalt patch to fill most of the depth. Compact in thin lifts.
4) Apply the sealant
- For cold-pour fillers, cut the tip to match crack width. Squeeze a steady bead and slightly overfill.
- For hot-pour products, heat to the manufacturer’s range. Use a pour pot for control and fill to just above flush.
- For concrete joints, use self-leveling polyurethane sealant. Do not overwork it.
5) Tool and finish
- Use a V-notched squeegee or trowel to level the bead.
- Lightly dust with sand to prevent tracking and add texture.
6) Cure and protect
- Respect cure times. Cold-pour fillers often need 4–8 hours. Hot-pour can skin in minutes but needs time to cool.
- Keep cars off for 24 hours if possible. Shade and cool air extend cure time.
7) Sealcoat if needed
- Sealcoating is not the same as crack sealing. It is a surface treatment that protects and evens color.
- Wait until crack filler cures. Then apply sealer in dry, mild weather.
Weather Timing: Upstate NY Freeze-Thaw Trend
Freeze-thaw days are when temperatures cross 32 F. These cycles drive crack growth. Plan sealing before the most active months.
| Month | Estimated Freeze-Thaw Days | Sealing Notes |
|---|---|---|
| January | 10–14 | Too cold. Monitor damage. |
| February | 10–14 | Too cold. Plan spring work. |
| March | 14–20 | Active cycle. Choose warm, dry days only. |
| April | 8–14 | Good window starts mid to late month. |
| May | 2–6 | Great window. Mild temps, lower rain risk. |
| June | 0–2 | Great window. Avoid extreme heat. |
| July | 0–1 | Possible, but hot afternoons can cause tracking. |
| August | 0–1 | Manageable. Watch thunderstorms. |
| September | 1–3 | Great window. Cool nights help cure. |
| October | 6–10 | Work early in the month for best results. |
| November | 10–16 | Late season. Use fast-curing products. |
| December | 10–14 | Usually too cold to seal. |
Approximate values reflect typical patterns for the Capital Region using historical climate normals. Your microclimate may vary.
Freeze-thaw days by month (Albany area, estimate)
Jan: ██████████ 12
Feb: ███████████ 13
Mar: ███████████████ 18
Apr: ███████████ 12
May: ██ 4
Jun:  0
Jul:  0
Aug:  0
Sep: █ 2
Oct: ████████ 8
Nov: █████████████ 15
Dec: █████████████ 14
Best months for sealing: May, June, and September. Aim to finish before late October.
Cost Comparison: DIY vs Pro
Here is what typical homeowners in Upstate NY spend.
| Approach | Scope | Cost Per Linear Foot | Typical Minimum | What You Get |
|---|---|---|---|---|
| DIY, cold-pour filler | Hairline to 1/2 inch cracks | $0.15–$0.50 | N/A | Basic filler, your labor, simple tools |
| DIY, hot-pour with rental | 1/8 to 3/4 inch cracks | $0.40–$1.00 | $50–$100 tool rental | Pro-grade material, more setup |
| Pro crack sealing | Mixed sizes, includes prep | $1.00–$2.50 | $150–$300 trip minimum | Fast production, proper routing, hot sealant |
Example
- 200 linear feet of mixed cracks
- DIY cold-pour: about $30–$100 in material
- DIY hot-pour with rental: about $80–$200 total
- Pro service: about $200–$500, subject to minimums
Compare quotes by asking what prep is included. Ask if routing and sand dusting are part of the price. Get at least three estimates starting with a search for crack filling near me.
Benefits of Proactive Maintenance
- Extends driveway life by slowing base damage.
- Keeps water out, the main cause of potholes.
- Reduces repair cost per foot over time.
- Improves curb appeal for daily pride and resale photos.
- Prevents weeds that split cracks wider.
- Makes snow removal smoother and safer.
- Lowers slip and trip risk for guests and delivery drivers.
Mistakes to Avoid
- Sealing when the crack is damp. Moisture blocks adhesion.
- Skipping cleaning. Dust and dirt prevent bonding.
- Overfilling. Thick mounds track and crack.
- Ignoring backer rod on deep cracks. Filler should not be too thick.
- Using the wrong product for asphalt vs concrete.
- Trying to seal alligator cracking line by line. Patch those areas.
- Sealcoating immediately after filling. Let materials cure first.
- Working below 50 F. Cold temps slow cure and reduce adhesion.
- Not fixing drainage. Water will find the weakest point.
- Skipping sand dusting. Fresh filler can be sticky.
Long-Term Impact on Resale and Curb Appeal
Buyers look at the driveway on arrival. A clean, tight surface signals care. It sets the tone for showings. Appraisers also note visible condition. While crack sealing alone does not change square footage, it supports the view that the home is maintained. That can help value and speed of sale.
Real benefits you can expect:
- Better listing photos and first impressions.
- Fewer inspection notes about site drainage or trip hazards.
- Negotiation leverage. You reduce the buyer’s list of expected credits.
- Lower chance of mid-winter driveway failures during the listing period.
Pair driveway work with other seasonal tasks. For example, review your plumbing shutoff plan before frost. See these practical plumbing tips for Latham homeowners. Also review this guide to common winter house issues in Albany to keep ahead of weather risks.
Q&A: Driveway Crack Sealing Basics
How often should I inspect and seal cracks?
Inspect every spring and fall. Seal any new cracks right away. Do not wait for a large project.
What temperature is best for sealing?
Between 50 and 85 F with no rain for at least 24 hours. Surface must be dry.
Can I seal in late fall?
Yes, if daytime temps are above 50 F and the surface is dry. Use fast-curing products and work earlier in the day.
How long before I can drive on it?
Cold-pour fillers often need 4–8 hours. Hot-pour can cool in 30–60 minutes but allow longer before heavy traffic.
Should I route the crack first?
Routing helps larger cracks accept more sealant and bond better. For hairline cracks, routing is not needed.
What if I have alligator cracking?
Do not fill the lines. Cut out the damaged area, rebuild the base, and patch. Then seal the seams.
Is sealcoating the same as crack sealing?
No. Sealcoating is a thin surface layer for protection and color. Crack sealing fills and seals gaps to block water.
Which is better, cold-pour or hot-pour?
Hot-pour lasts longer and stays flexible. Cold-pour is easier for quick DIY. Choose based on crack size and tools.
How do I find a qualified local contractor?
Check reviews, ask neighbors, and compare written quotes. Start with a search for crack filling near me. Verify insurance and ask about warranty terms.
Will sealing stop weeds?
Sealing blocks light and space in the crack. It helps, but you may need to remove existing roots first.
Quick Comparison Summary
| Option | Best For | Pros | Cons |
|---|---|---|---|
| DIY cold-pour | Small, new cracks | Low cost, easy | Shorter life, may need rework |
| DIY hot-pour | Medium cracks, skilled DIYers | Durable, flexible | Equipment, learning curve |
| Pro service | Large quantity, mixed sizes | Quality prep, speed, warranty | Higher price per foot |
Action Plan for Upstate NY Homeowners
- Walk your driveway this week and list crack sizes and locations.
- Pick a 48-hour dry window within the next month.
- Buy the right filler and backer rod for your crack sizes.
- Clean, fill, and finish in small sections.
- Schedule sealcoating if the surface is dull or porous.
- If you see base failure or wide, deep cracking, get pro quotes.
- Set a recurring spring and fall inspection reminder.
Conclusion: Keep Water Out, Keep Value In
Crack sealing in Upstate NY is simple. It stops water, slows freeze-thaw damage, and protects your base. You save money and protect curb appeal. DIY works for small, stable cracks. Hire a pro for wide gaps, base issues, and large quantities. If you want a local team that knows our seasons, contact A&S Home Services for a prompt site check and a clear plan.
This post has been published by Powerful Media Solutions. If you are looking for a marketing agency, please reach out.