
What Are the Most Common Drywall Repairs in Albany Homes?
Summary
- Freeze–thaw, humidity swings, and older walls make Albany drywall issues predictable
- Small patches are fine; water damage and sagging often justify section replacement
- Lighting and paint sheen can reveal seams more than the repair itself
- Moisture sources must be fixed before any cosmetic work or stains will return
- Budget choices—tape, mud, bead, primer—change longevity and finish quality
I work on walls every week across Albany, Clifton Park, and the wider Capital Region. Patterns repeat. The same seasonal cracks open in winter, the same nail pops show up around stairwells, and the same moisture stains creep back in basements that never really dried out. Some of this comes from our housing stock. Some of it comes from Upstate New York weather. A lot of it comes from normal life—kids, pets, furniture moves, rental turnover.
From my side of the ladder, the most common drywall repairs in Albany NY fall into a few buckets: settlement cracks at seams, corner bead damage, door knob holes, nail pops, tape blistering, patching after plumbing or electrical work, and water damage from roof or bathroom leaks. The choices that matter are less about the patch itself and more about what you do first (source control), what materials you pick, and how you finish under the lighting the room actually has.
Why drywall problems are so common in Albany and the Capital Region
Older housing stock and plaster-to-drywall transitions
In Albany’s older neighborhoods, I often see original plaster patched with drywall over the decades. Plaster moves and flexes differently than modern gypsum board. Where old plaster meets newer drywall, seams tend to crack. Keys in old plaster can fail, leading to drummy spots and sagging ceilings that a surface patch won’t hold.
Freeze–thaw cycles, ice dams, and humidity swings
Upstate winters contract framing. Summer humidity swells it. That seasonal push–pull opens seams, especially on long hallways and cathedral ceilings. Ice dams are another local problem; water backs under shingles and finds its way into exterior walls and ceilings. I’ve opened plenty of areas where the top layer looked fine but the paper faced dark brown from repeat wetting.
Basements and below-grade moisture
Basements in Albany and Clifton Park often sit against damp soil. If paper-faced drywall or non-rated board went up directly on a cool concrete wall without a proper system, you’ll see wicking, musty odors, and paper delamination. Patching over it doesn’t hold; the moisture keeps working.
Rental turnover and wall wear
In multi-family buildings and student rentals near downtown, I see anchor holes, peel-outs from overloading shelves, and quick roll-and-go paint hiding taped-over patches. These repairs fail early because the substrate wasn’t stabilized and fasteners weren’t backed.
Common drywall repair misconceptions I run into
- “Spackle fixes everything.” Spackle is for shallow divots. For cracks, seams, or anything that moves, you need tape and joint compound. For crushed corners or soft substrate, replacement beats gooping more on.
- “Paint hides flaws.” Under raking light (like winter sun or a strong ceiling wash), paint highlights flaws. Gloss and semi-gloss magnify them.
- “Mesh tape is stronger.” Mesh is convenient and fine for small holes with setting compound, but it can telegraph under thin paint and fails at inside corners. Paper tape handles corners and tapered seams better.
- “Matching texture is easy.” Legacy textures—old stomp, orange peel, or hand-floated finishes—take practice. A patch that looks great at noon can show like a halo at sunset.
- “It’s okay to patch over moisture.” If the paper face is stained or soft, or the framing is damp, stains will return and mold risk remains. Source first, then patch.
- “Every crack is structural.” Most aren’t. I see seasonal movement, dry framing, and screwed ceilings that missed joists. Multi-plane cracks and doors out of square might suggest something more.
Budget decisions that change outcomes
I don’t push premium everything. I do explain where choices affect lifespan and finish. Here’s how I frame tradeoffs in Capital Region homes:
| Decision | Lower-Cost Choice | Higher-Cost/Alt Choice | When it Matters in Albany/Clifton Park |
|---|---|---|---|
| Patch vs. replace section | Surface patch over soft paper | Cut back to solid, install backers, new piece | Water damage or crushed corners—replacement lasts; patches on compromised paper fail |
| Tape type | Fiberglass mesh | Paper tape (or paper with setting mud) | Paper resists seam cracks better on long runs and inside corners under seasonal movement |
| Compound | Premixed all-purpose only | Setting-type (“hot mud”) base + light finish | Hot mud sets faster in cool basements/winters and resists re-softening in humid summers |
| Corner bead | Standard metal | Vinyl or bullnose profile | Metal dents near busy doorways; vinyl springs back better; bullnose softens shadows |
| Primer | Standard PVA | Stain-blocking/shellac or oil-based | For water, nicotine, or grease, stain-blocking stops bleed-through common in older Albany homes |
| Finish level | Level 3 (light texture/flat) | Level 4–5 (skim coat) | Rooms with strong side light or eggshell+ sheen show seams; higher finish reduces telegraphing |
| Fire rating | Standard 1/2 in. board | Type X and fire taping | Garage/common walls need rating for safety and code; replaces shortcuts I still find in older garages |
| Dust control | Open sanding | Vac-sanding + isolation | Occupied homes and rentals during turnover benefit from cleaner workflow |
Lighting realities in Upstate New York homes
- Low winter sun: Shallow angles roll across walls and show seams, especially over long hallways and stairwells.
- LED color temperature: Cooler LEDs (4000K–5000K) sharpen edges. Warm LEDs soften a bit. I see more complaints after lighting upgrades.
- Window direction and ceiling wash: South and west exposures rake evening light across ceilings. If you add a ceiling wash fixture, plan for a higher finish level.
Seasonal and environmental constraints
- Working temperature/humidity: Joint compound likes 55–70°F and moderate RH. Cold basements in February slow curing and cause cracking if layered too fast.
- Drying time: In winter heat, compound can skin over; in summer humidity, it stays soft. I space coats accordingly and often switch to setting-type base coats in winter.
- Source correction: I don’t tape over active leaks, even if the owner is in a rush to paint before listing. Roof, flashing, or plumbing need to be addressed first.
DIY décor and hardware swaps that help vs. hurt
- Doorstops: Inexpensive and they stop the classic doorknob hole. I add them during repairs when I notice missing ones.
- Command strips vs. anchors: Strips are fine for light decor. For shelves or heavy art, use proper anchors or toggles. I fix plenty of tear-outs where strips were overloaded.
- TV mounts and shelves: In lath-and-plaster or older drywall, toggles or blocking are critical. Missed studs and undersized anchors lead to big patches later.
- Patching large anchor holes: For anything bigger than a nickel, especially in hollow spots, a backer (butterfly patch, plywood, or repair clip) prevents sink-in and cracking.
When drywall repair costs stop making sense
- Recurring leaks or visible mold: Repainting adds cost without fixing the driver. Removal, drying, and sometimes partial replacement pay off.
- Widespread staining or nicotine: Spot patches halo. Full-room prime with stain-blocker and a skim or replacement is often more efficient.
- Sagging ceilings and multi-plane cracks: These point to failed fasteners or plaster keys. Refastening with screws and washers or replacing sections beats endless taping.
- Large-area texture mismatch: Tiny patches can blend; large ones telegraph. A full skim to Level 5 makes more sense if the room is a priority space.
How I think about cost vs. return in the Albany market
- Resale readiness and inspections: Inspectors flag moisture, poor fire-rated assemblies at garages, and active settlement. Clean seams, proper primer, and corrected moisture reduce callouts.
- Rental turnover: Faster turns matter. I keep a consistent paint sheen and color map for owners so spot touch-ups blend. It avoids repainting full walls unnecessarily.
- Insurance after water events: Photos before demo, during drying, and after patching help claims. I document moisture readings and materials replaced; adjusters ask.
- Energy and air sealing: When walls are open, I add air sealing at top plates, outlets, and penetrations. In drafty Albany homes, this small step is worth it.
Step-by-step drywall repair checklist for Albany homeowners
- Diagnose and isolate: Find the source. For leaks, shut water or tarp a roof if needed. Verify moisture is down with a meter or at least by touch and time.
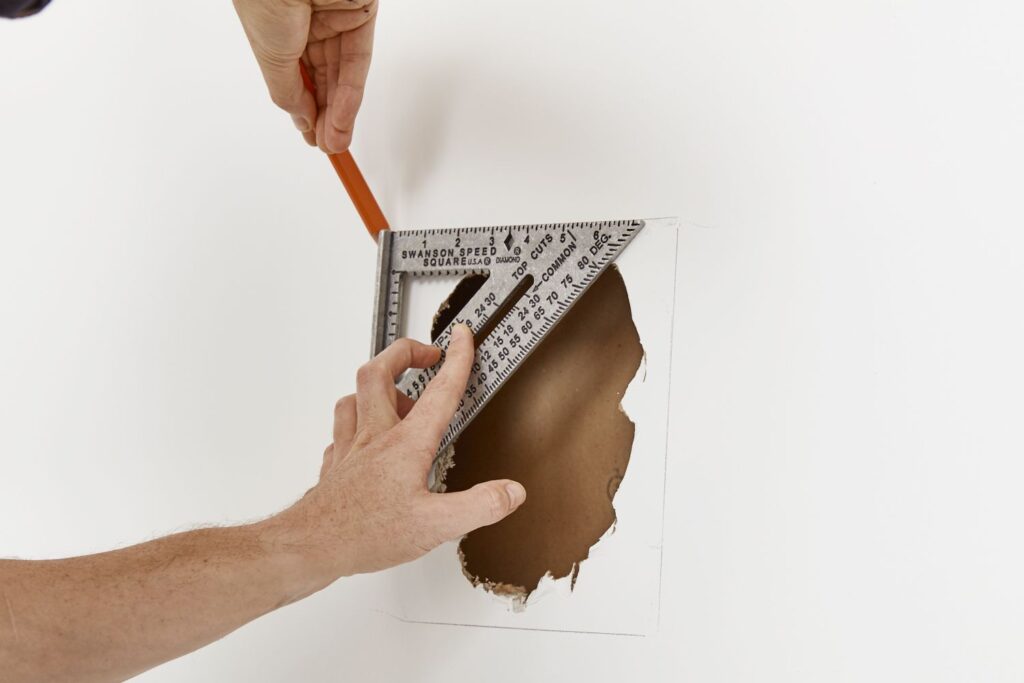
- Plan the cut: Square up irregular damage. Cut back to firm paper and solid gypsum. In plaster, probe for loose keys and define a stable perimeter.
- Backers and fastening: Install wood or repair clips. Screw off edges every 6–8 inches. Refasten sagging ceilings with screws and plaster washers if needed.
- Tape and mud sequence: For seams and cracks, embed paper tape in a tight first coat. Use setting-type compound for the base in cold rooms. Let it set, then apply two to three wider coats.
- Feather and sand: Feather 8–12 inches around seams; more for bad lighting angles. Use vac-sanding or damp-sanding to control dust in occupied spaces.
- Prime right: Use stain-blocker on any water, smoke, or grease area. Standard PVA is fine on new drywall without contamination.
- Paint and sheen: Match existing sheen. Flat hides; eggshell or satin shows. In window-washed rooms, consider a higher finish level before you jump to a shinier paint.
- Cleanup and containment: Wipe surfaces, change HVAC filters if you sanded near returns, and remove masking last.
Typical local outcomes and timelines
| Repair Type | What I See Most in Albany/Clifton Park | Typical Working Time | Notes |
|---|---|---|---|
| Nail pops and hairline seams | Stairwells, ceilings, long hallway seams | 2–3 visits over 2–4 days | Seasonal movement; screws and proper tape help prevent return |
| Corner bead dents | High-traffic doorways, garages | 1–2 visits | Vinyl bead holds up better in rentals and busy entries |
| Doorknob holes | Behind doors without stops | 1–2 visits | Install a stop to avoid repeat |
| Water-stained ceilings | Ice dam or bath fan duct leaks | 2–4 visits plus drying time | Stain-blocking primer is non-negotiable after source fix |
| Plaster-to-drywall transitions | Older Albany homes | 3–5 visits | Skim coat or control joints reduce future cracking |
Scenarios I walk through with homeowners
- Small bath leak, stained kitchen ceiling: If the drywall feels firm, I prime with stain-blocker, skim as needed, and blend paint. If the paper is soft or bubbled, I cut and replace the section.
- Repeated seam crack on exterior wall: I check insulation voids and humidity before re-taping with paper and a wider feather. Sometimes adding a control joint is smarter than chasing the same crack every winter.
- Rental with many anchor holes: I use backers for larger tear-outs, mesh+setting mud for quick small holes, then standard finish. Keeping the same paint brand and sheen speeds the turn.
Albany lighting, finish level, and paint: a quick guide
| Room/Lighting Condition | Better Finish Choice | Why |
|---|---|---|
| South-facing rooms with afternoon sun | Level 4 or skimmed seams, flat/eggshell paint | Raking light exposes edges |
| Basements with mixed LEDs | Standard Level 3–4, warm 2700–3000K LEDs | Warm light softens minor seams |
| Hallways with ceiling wash fixtures | Level 5 on long runs, paper tape | Wash lighting magnifies any ridge |
FAQs I hear in Albany and Clifton Park
When does DIY make sense vs. calling a pro?
Small nail pops, picture-hanger holes, and a single doorknob hole are good DIY practice. If you’re dealing with an active leak, sagging ceiling, large texture match, or a long seam that’s opened multiple times, the failure modes multiply and pro methods save rework.
Can you really match old paint and texture?
Sometimes. Exact paint matches on aged walls are rare. I use break points (corners, trim lines) to hide transitions. For legacy textures, I sample and test under the room’s light before committing.
How do you manage dust in an occupied Albany home?
Containment, vac-sanding, and damp-wiping. I isolate rooms, cover returns, and use sanding heads with vacuums. It’s slower than open sanding, but it keeps life running during repairs.
Should I repair before listing a home?
If inspection risk includes moisture stains, garage fire-rating issues, or visible cracks, handling those ahead of time reduces renegotiations. For minor scuffs, touch-ups and consistent sheen help photos more than people expect. I summarized broader timing decisions in a short guide on handling home repairs before they grow.
What about searches for “drywall repair near me” in Albany?
That phrase just triggers location-based options. What matters is whether the provider understands local issues—plaster transitions, ice dams, basement moisture—and can explain tradeoffs that fit your home and timing.
A local perspective on common repairs
In my day-to-day across Albany NY and Clifton Park, the “common” repairs are predictable: seam cracks from seasonal shifts, dents at corners, holes from hardware, and water-marked ceilings. The uncommon part is the room you put them in—the specific light, the age of the wall, the moisture history, and the finish you expect. That’s where the right sequence and materials matter most.
I keep an eye on what fails in our area and why. Paper tape in corners outlasts mesh. Stain-blocker earns its keep on older ceilings. Type X belongs at garage walls even when nobody sees it. And when I write up plans for drywall repair in clifton park new york, I think about afternoon sun on big walls and the dust control needed in lived-in spaces. If a repair won’t hold because of a wet substrate or a failing plaster section, I don’t dress it up—replacement or a full skim is a cleaner path. When a small, well-feathered patch will disappear under flat paint, I keep it simple.
If you’re sorting out priorities, I’ve also pulled together a handyman’s view on how to handle home repairs before they grow so minor wall issues don’t become major ones. And for anyone comparing approaches, this same local logic applies whether you’re in downtown Albany, a Clifton Park colonial, or a ranch in the broader Capital Region.
One more note on scope, timing, and expectations
Drywall work is staged. Coats need time. In winter, I account for slow curing and use setting compounds. In humid summers, I ventilate and stretch intervals. A basic nail-pop cycle might wrap in a couple of days; a water-damaged ceiling with stain-blocking and full repaints can run a week including drying. That pacing is normal here and avoids shortcuts that show up later under our tough lighting and seasonal movement.
Whether the job is a door hole or a skimmed living room, the outcome you notice most in Albany homes is the finish, not the patch. Shadows, sheen, and straight lines tell the story. That’s why I match the repair to the light and the use of the room every time, including for drywall repair in clifton park new york where large, bright great rooms are common.
Conclusion
Most drywall fixes in Albany and the Capital Region are straightforward once moisture is handled and the lighting is considered. Materials and steps matter, but the decisions that stick are local: how your home moves through the seasons, what the room’s light does at 4 p.m. in January, and where you’re willing to draw a line between quick patch and longer-term solution. That’s the lens I use on every wall I touch around here.